Flooring Take-Off: Screed, Underlay and Finish
Calculating a Room Correctly
A flooring take-off is deceptively simple on the surface - measure the room, order the floor. In practice, most rooms involve at least three separate material calculations: the screed or preparation layer, the underlay, and the finish itself. Each has its own unit, its own wastage rate and its own ordering logic. Get any one of them wrong and you are either sending materials back or waiting for a second delivery while the job sits half-finished.
Layer One: The Screed
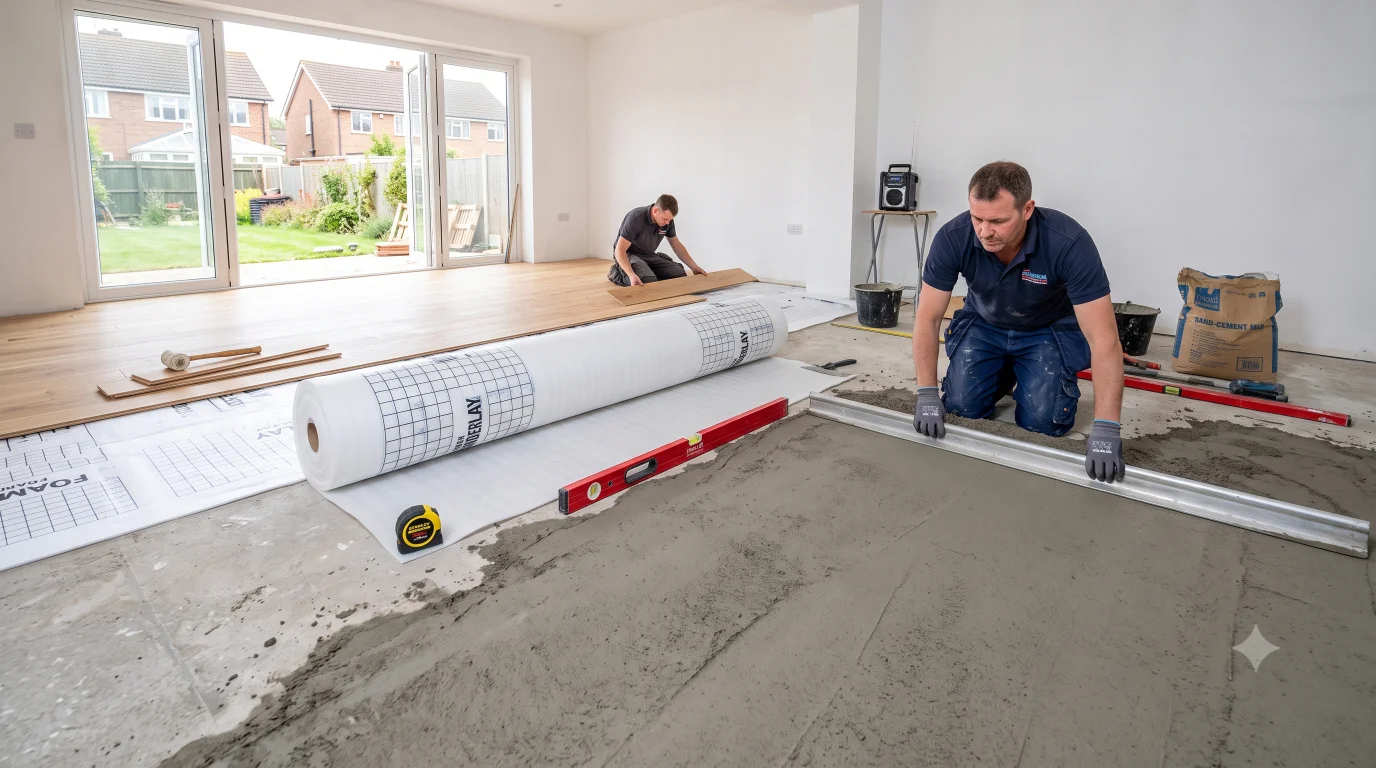
A sand and cement screed is laid over a concrete subfloor to provide a flat, smooth base for the finished floor. It is also used to bring the floor level up to a required finished floor level (FFL) and - in modern construction - to encapsulate underfloor heating pipework.
Screed is calculated by volume. The calculation is straightforward:
The depth you use depends on what the screed is doing. Standard thicknesses:
- Floating screed over insulation: 65-75mm minimum. This is the most common specification in modern new-build, where the screed floats over a layer of rigid insulation above the concrete slab. A floating screed thinner than 65mm is prone to cracking and debonding.
- Bonded screed (keyed directly to concrete): 25-40mm. Used where the floor-to-ceiling height is limited and the screed can be mechanically bonded or primed to the substrate. Requires the concrete subfloor to be properly prepared and primed.
- Screed over UFH pipework: typically 65-75mm to the underside of insulation, giving at least 25-35mm of screed cover above the pipe crown. The pipe diameter and layout must be confirmed before specifying depth.
For a living room 5.0m x 4.0m with a 70mm floating screed: 5.0 x 4.0 x 0.070 = 1.40m3 of screed. Add 5-10% for waste, uneven subfloor variation and edge losses: order 1.55m3.
Screed Mix and Ordering Options
Traditional sand and cement screed is mixed at 3:1 or 4:1 (sharp sand to cement by volume). Ready-mixed screed is available from most concrete suppliers and simplifies delivery on larger areas - on smaller jobs, mixing from bags is usually more economical.
- Bag mix: a 25kg bag of screed mix covers approximately 0.01m3 at 50mm depth. For 1.55m3 you would need approximately 155 x 25kg bags - practical only for very small areas. Mixing from separate sharp sand and cement bags is significantly cheaper at this volume.
- Ready-mixed screed: delivered by transit mixer or pump truck. Minimum order quantities typically start at 0.5-1.0m3 depending on the supplier. Pump delivery is essential for upper floors or when access to the room is difficult.
- Liquid anhydrite (calcium sulphate) screed: a self-levelling alternative to sand and cement that flows around UFH pipework without manual compaction. Faster to lay per m2 but more expensive per m3. Cannot be used below tiles in wet areas without a DPM and tile adhesive system rated for anhydrite screeds.
Screed Drying Time
This is where many flooring programmes go wrong. Traditional sand and cement screed dries at approximately 1mm per day up to 40mm depth, then more slowly beyond that. A 75mm screed takes a minimum of 75 days to dry sufficiently for most floor finishes - longer in cold or damp conditions, faster with forced drying from dehumidifiers and heating.
Do not lay underlay or hard flooring over screed that has not been moisture-tested. The standard test is a hygrometer reading of 75% relative humidity or below (expressed as 75% RH). Testing should be done with a calibrated instrument left in contact with the screed surface for a minimum of 72 hours - not a damp meter held against the surface for a few seconds, which is not reliable.
Liquid anhydrite screed dries faster: typically 1-2mm per day, and some suppliers allow foot traffic within 24-48 hours. However, the surface must be lightly sanded and vacuumed before laying any finish, and a moisture test is still required before the final floor goes down.
Layer Two: The Underlay
Underlay is ordered by area (m2). The calculation is simply the room area, but with important adjustments for waste:
For the same 5.0m x 4.0m room: 20m2 x 1.10 = 22m2 of underlay.
Underlay comes in rolls of various widths (typically 1.0m or 1.83m wide) and lengths (usually 10m or 15m per roll). Calculate how many rolls you need based on roll size, allowing for the direction you will lay it and the number of joins.
Underlay Types and Specifications
The correct underlay depends on what floor finish is going on top and what the subfloor is doing:
- Foam underlay (PU foam, 3-5mm): the standard choice for laminate and engineered wood floating floors. Provides acoustic dampening and minor surface levelling. Some versions include a built-in moisture barrier (foil backing) which is essential over concrete subfloors.
- Rubber crumb underlay: denser and more durable than foam, suitable for high-traffic areas. Used under hardwood, engineered wood and carpet.
- Carpet underlay (felt or foam, 7-10mm): thicker and softer than hard floor underlay, designed specifically for carpet. A 10mm felt underlay under a mid-grade carpet transforms the feel underfoot and extends carpet life significantly.
- Acoustic underlay: higher-density products (typically 5mm foam or rubber) with a high-performance acoustic rating, required in flats and multi-occupancy buildings under Building Regulations Part E. Check the Rw and LnTw ratings specified by the acoustic consultant.
- No underlay - direct bond: tile, stone and some wood floors are laid directly onto the screeded substrate with adhesive. Underlay is not used.
Over underfloor heating, check the total thermal resistance (tog) of the underlay and floor finish combined. Most UFH manufacturers specify a maximum combined tog value of 1.5 or 2.0 - exceed this and the system struggles to reach set-point temperatures and runs inefficiently. Thin foam underlays (3mm) typically have a tog value of around 0.5-0.8, leaving sufficient headroom for most floor finishes.
Layer Three: The Finished Floor
Hard floor finishes - laminate, engineered wood, solid hardwood, LVT (luxury vinyl tile) and carpet - are all ordered by area with a waste allowance that depends on the board size, room shape and laying pattern.
Standard Waste Allowances
- Straight lay (boards parallel to longest wall): add 10% waste
- Diagonal lay (boards at 45 degrees): add 15% waste - the angled cuts waste significantly more material per row
- Herringbone or chevron pattern: add 15-20% waste depending on board size and room proportions - the pattern requires precise cuts and board alignment
- LVT or carpet tiles: add 10% waste minimum; 15% for diagonal or non-rectangular rooms
- Carpet in a roll: waste depends on room shape and roll width - a room significantly narrower than the roll width generates unavoidable strip waste
For the 5.0m x 4.0m room with a straight-lay engineered wood floor: 20m2 x 1.10 = 22m2 of boards. Boards are typically sold by the pack, covering a stated area per pack. Divide 22m2 by the pack coverage and round up to the next whole pack.
Calculate Your Flooring Materials
Our free calculators handle screed volume, underlay area and hard floor quantities - including waste, pack sizes and layer depths.
Screed Calculator Underlay Calculator Hard Flooring CalculatorWorked Example: Open-Plan Kitchen-Diner
An open-plan kitchen-diner, L-shaped: main area 6.0m x 4.0m = 24m2, kitchen wing 3.0m x 2.5m = 7.5m2. Total area 31.5m2. The spec calls for a 75mm floating screed over insulation, foam underlay with integral DPM, and engineered oak boards laid straight.
Screed:
- Volume: 31.5m2 x 0.075m = 2.36m3
- Add 8% waste: 2.36 x 1.08 = 2.55m3
- Order: 2.6m3 ready-mixed screed
Underlay:
- Area: 31.5m2 x 1.10 = 34.65m2
- Using 10m x 1.0m rolls (10m2 per roll): 34.65 / 10 = 3.47, round up to 4 rolls
Engineered oak boards:
- Area: 31.5m2 x 1.10 = 34.65m2
- Boards sold in packs covering 1.8m2 each: 34.65 / 1.8 = 19.25, round up to 20 packs
Common Take-Off Mistakes
- Measuring to the wall face rather than the screed face. If the walls have yet to be plastered, the finished room will be smaller than the current shell dimensions. Allow for plaster thickness (typically 12-15mm per face) when calculating flooring areas in unplastered rooms.
- Forgetting the threshold strips. Where the floor finish meets a different floor in a doorway, a threshold or T-bar strip is needed. Order one per doorway opening - they are frequently forgotten and are fiddly to order separately once the floor is down.
- Ordering boards from different batches. Engineered wood and laminate floors vary slightly in shade between production batches. Order everything you need in one go, using the same batch number. If you need to top up later, the new batch may not match.
- Not accounting for acclimatisation. Engineered wood and solid hardwood must acclimatise to the room conditions before laying - typically 48-72 hours with boards flat on the floor in the room where they will be installed. Allow for this in the programme before laying starts.
- Laying before moisture test passes. As covered under screed drying time - the floor goes down when the screed is dry, not when the programme says it should be dry. Build contingency into the flooring programme for extended drying periods.
The Order in Which Things Happen
The flooring sequence matters as much as the quantities. The typical order for a new-build room from structural slab to finished floor:
- Concrete ground slab or beam-and-block floor - structural work complete
- DPM (damp-proof membrane) applied to slab if required by specification
- Rigid insulation boards laid to required thickness
- UFH pipework installed if specified - pressure-tested before screed goes over
- Edge insulation strips fitted around room perimeter to allow screed to expand
- Screed poured and laid to level - drying period begins
- First and second fix joinery, plastering and decoration completed during drying period
- Moisture test passed - underlay laid
- Hard floor finish laid - threshold strips, skirting boards, beading
Getting this sequence wrong - particularly skipping the moisture test - is the most expensive flooring mistake a builder can make. Engineered wood laid over a wet screed will absorb moisture, expand and buckle within weeks. Replacing it means stripping the floor, waiting for the screed to dry, retesting and relaying - a costly and entirely avoidable rework.